
Features
- Compatible with any IR remote controlled devices
- Built-in Photocell sensor for day/night control
- LCD display for easy operation
- Sensor with 16ft long cable for close placement to plant canopy
Overview
The Beta-1 is a simple solution for the Mini Split Air Conditioners.
It uses the remote control that came with your mini split air-conditioner to “learn” how to change the setpoints on the mini-split. Just about any brand of mini-split unit can be controlled by the Beta-1. Once the Beta-1 learns the signals from your remote controller, it will automatically change the setpoint on the mini-split to two separate Day and Night temperatures. It does this AUTOMATICALLY by using a small IR (infrared) emitter / sending unit that will send the same signal to the mini-split, as the remote control would normally send.
Product Specifications
Package Content
1 x Beta-1 Controller
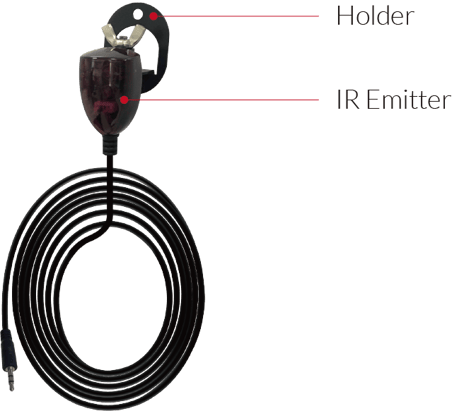
1 x IR Emitter
1X16ft NTC Sensor
Intput Voltage
120 Volts AC
Maximum Current
0.2A
Working Environment
Temperature 32-122°F, Humidity<90%
AC Power Cord Length
1.8m
Packaging Dimensions
275mm(L) x 85mm(W ) x 95mm(H)
G.W. per pack
0.56kgs
User Manual
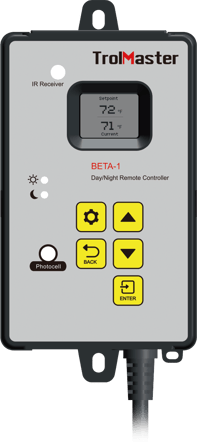
Overview
Thank you for purchasing TrolMaster's BETA-1, Automatic Remote Controller.
The BETA-1 offers universal control for any infrared (lR), remote controlled air conditioners (AC), such as a mini-split AC systems. Almost any air conditioner / AC that has an infrared / lR remote controller can be used with the Beta-1. Once installed the Beta-1 will provide separate Day and Night temperature settings for your AC unit.
Installation is easy. The user simply “teaches” th e Beta-1 how to control the AC by using the remote control that comes with their AC unit. Once the Beta-1 learns the lR remote signals, the Beta-1 will automatically change the settings on their AC unit, to temperature settings selected by the user.
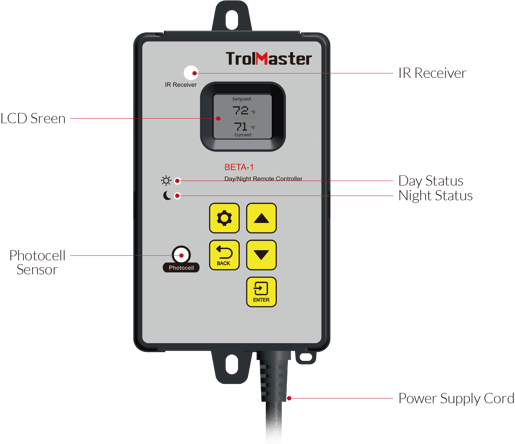
The user selects separate day & night temperature settings, and the Beta-1 will command the AC to operate at those temperatures. The Beta-1 decides which temperature to operate the AC, based on the status of the photocell built into the Beta-1. The Beta-1 also features aremote temperature sensor with a 16 foot long cable that allows placement of the sensor at the plant canopy.

FEATURES
- Compatible with most lR remote controlled AC / mini-splits
- Built-in photocell activates separate day/night temperature settings
- Temp sensor with 16ft long cable for close placement to plant canopy
- LCD display for easy operation
HOW IT WORKS
The Beta-1 works by learning the unique digital “code” that is sent to the AC unit from the remote control. You use the remote control that came with your AC unit to “teach" the Beta-1 those signals. Once the “learning” process is complete, the Beta-1 will send those digital signals to the AC unit AUTOMATICALLY to change the AC unit's temperature setting. The AC unit still operates as it did before and it still monitors and controls its own temperature based on its own internal sensors. But now, the Beta-1 now provides user-adjust-able auto- matic Day and Night temperature settings for your AC unit.
SAFETY
The Beta-1 has other important built-in safety functions.
Power reset: lf power is interrupted to the Beta-1, it will resend the lR signal to turn on your AC back on to the correct temperature.
Temperature monitoring: To ensure the AC has been set to the desired user temperature, the BETA-1 will also constantly monitor the environment temperature using its temperature sensor. lf the Beta-1 measures room temperatures that deviate more than +/- 10°F (5.5°C) from the setting temp, the Beta-1 will resend the lR signal to the AC to the proper temperature setting.
INSTALLATION
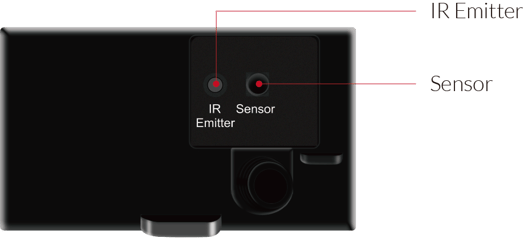
- First you should determine where to mount the Beta-1 so that the remote lR emitter module can properly send the signal to the AC unit.
- The lR emitter must be positioned so that it directs the infrared / lR signal to the AC.
- ldentify the infrared / lR “window" on the AC then use the provided mounting bracket to install the lR
- emitter module as close to the AC as possible.
- Adjust the lR Emitter module to point towards the AC IR receiver.
OPERATION INSTRUCTIONS
Teaching (learning) theremote control codes
The next step is to teach the Beta-1 your remote control “codes". Before you start, you must first figure out the
setting range for YOUR particular AC unit.
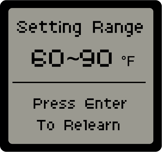
Using the remote control that came with your AC, use the UP and DOWN buttons to display, and then write down the lowest and the highest possible temperature settings that your remote control allows. You will need this information in the following steps.
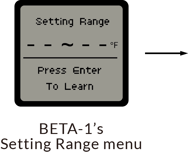
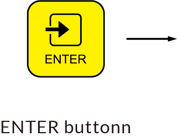
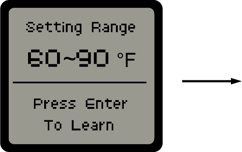
- When the Beta-1 has not yet learned your infrared remote control code, the LCD screen will show the Setting Range page as shown below. Press the Enter button to start learning process.
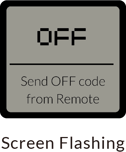
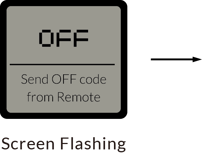
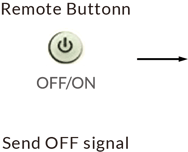
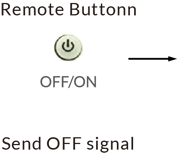
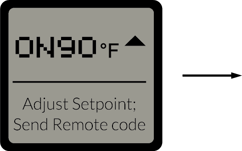
- The screen will flash the first set-point to teach the Beta-1 which will be the “OFF" signal. With the remote control “ON", point the remote control away from the Beta-1. Using the remote, adjust the temperature setting to your lowest temperature set-point. (Make sure the AC is set to ON before pointing your remote to the lR receiver on the controller.)
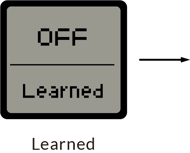
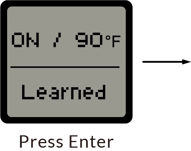
- Point your remote control at the lR receiver on the Beta-1 and then press the OFF button to send the OFF command to the Beta-1. The LCD screen will display “Learned" which indicates that the Beta-1 has successfully learned the infrared remote control code for “OFF".
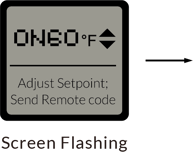
- The LCD screen will now be asking for the next learning set-point. lt is the lowest possible temperature set-point for your AC, the value that you wrote down earlier. The default LOWEST temperature set-point for the Beta-1 will be 50°F / 10°C.
- So next use the up button on the Beta-1 to adjust the temperature setting to your desired lowest set-point to be the same as the lowest possible setting on the remote control.
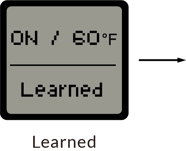
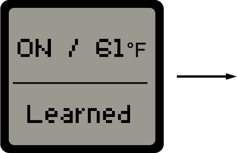
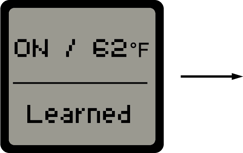
- Point the remote controller towards the lR receiver (on the front of the Beta-1) and then press the “ON” button to send the lowest set-point of your setting range. The LCD should show “Learned” if the controller received the lR signal properly. The Beta-1 display will then jump to the next temperature set-point (up 1 degree) automatically.
- Next, with the remote controller pointed at the Beta-1 lR receiver use the up button on the remote controller to increase the set-point by one degree to send the next temperature setting signal to the Beta-1.


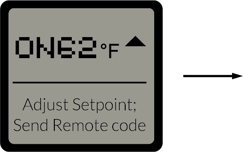


*If the BETA-1 failed to learn the Remote code during the process, the LCD will show “Error" and stay at the unlearned set-point. Adjust the remote set-point backwardly to send the same set-point signal tp redo the learning process.
- Repeating the same process, the BETA-1 will learn the rest of the temperature set-point signals from your remote controller. After the highest temperature set-point of your AC setting range is reached, press the Enter button to confirm and complete the learning process.
Selecting Day / Night tem-perature settings
Once the Beta-1 unit is programmed using the remote, the last step is to select the Day and Night temperature settings you want to use. Once the temperature settings are selected by the user, the settings will automatically be sent from the Beta-1, to the AC unit (using the lR emitter), each time the built-in photocell determines it is day or night.
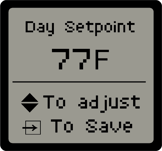
1. Set Day Temperature Set-point
Press the Setting button to enter the Day set-point page. Use the up and down buttons to adjust the set-point and then press the Enter button.
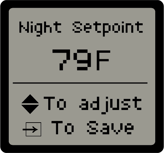
2. Set Night Temperature Set-point
Press the Setting button to enter the Night set-point page. Use the up and down buttons to adjust the set-point and then press the Enter button.
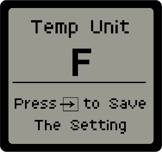
3. Set Temperature format
Press the Setting button to enter the temperature unit setting page. Press the up and down button to adjust the temperature format to select Fahrenheit or Celsius. Press the Enter button save setting.
Heat / Cool programming
To use the BETA-1 to control BOTH heating and cooling on your mini-split, you must choose which temp settings you will use for heat, and which ones forcooling. Each temp setting can only be assigned EITHER heat OR cooling, but not both.
So the first thing to do is decide at which point you will change from heat to cooling settings. A common set-up would be a setting range from 64 to 86 degrees. You can select 64, 65, 66, 67, 68, 69, 70, 71, 72 and program those temperatures with the remote controller on the mini-split set to HEAT or AUTO mode. Then you would program the other temp settings 73, 74, 75 etc all the way up to 86 degrees with the remote selected to be in COOL mode.
With this example above, you will be able to set the BETA-1 to send heating or auto settings to the mini-split from 64 to 72 degrees, and send cooling signals to the mini-split from 73 to 86 degrees.
Remember that the heat /cool “split" point can be at any degrees you desire, but there can only be a single setting “mode" for each temperature setting.
FACTORY DEFAULT SETTINGS
SPECIFICATIONS
For any issues or concerns with our products, DO NOT return them to the store. Please contact our tech support department at support@trolmaster.eu
Here you will find the Manual for the BETA-1, Link
Here you will find the Tech Sheet for the BETA-1, Link